Showing posts with label textiles. Show all posts

Thursday, 10 January 2013

Scrappy fabric tutu {no sewing}

Hello you.

It's been a wee while. Turns out that life with a toddler is even more all-consuming than life with a baby. Who knew?! However, I did also have my BSL level 3 to complete, but that's done now, so I have time to blog.


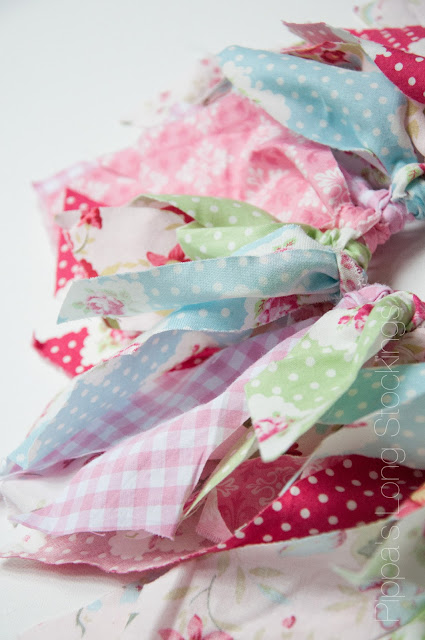
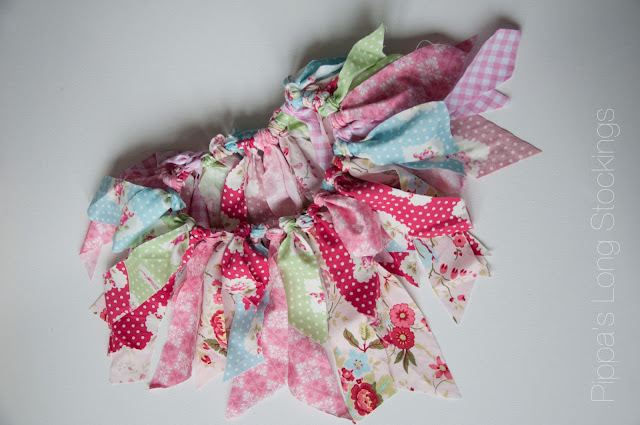
So,  a little while ago (summer, perhaps. I'm not sure), I was commissioned to make something for a 3 year old girl. I excitedly suggested a tutu. I was told that the girl already loved tulle ballerina tutu. Ah, but did she have a scrappy fabric tutu?! This is a whole new world of tutu. This is a whole new tutu world. This is a new tutu for a new world. This is... different.
 

I used strips (varying lengths) of fabrics, with some Cath Kidston fabrics thrown in.


Using a 1" wide strip of elastic, I made a circle and tied it in a knot.


Taking the fabric strips, I tied/knotted them to the elastic.


It really was that easy. You could definitely make this.


And, because I didn't have a 3 year old girl to hand, I decided to model the tutu on my son's teddy so you could kind of see how it might look worn around the waist.


The teddy did not look happy about being used like this.


Wednesday, 16 May 2012

rainbow cloud

It began when I spotted this plushie on Pinterest.


I wanted one for my own baby. So I made one.


He really likes it.


Saturday, 17 March 2012

the finished rainbow playmat

My intention was that it could be used as a thin quilt and double up as a playmat. I now think it wouldn't make a particularly cozy quilt, so it's just a playmat. A super cool playmat.

So, these were the fabrics I chose back in September. They didn't come as part of a set. I just had a rummage in the 'fat quarter' bin for the brights and was most pleased with what I found.


And here's what I did with them next:


I had bought some cheap fleece a while back, so used that as the middle/inside of the playmat (you quilters are probably flinching at my having made it up as I went along). I kept the back plain, as it's only going to be on the floor anyway.


I ran it through the machine and stitched some wavy lines. But not too wavy.


I couldn't decide on which colour bias tape to use, so I went with four. Orange spotty:


Plain purple:


Blue spotty:


And plain green, which you can see the first picture of the finished playmat.

It was first used when O was a month old and I did a one month photo shoot with him lying on the mat (with plenty of cushions underneath to support him).


Now, it's used as an actual playmat. He has fun on there, which makes me happy.


Thursday, 12 January 2012

rainbow quilt/playmat

So, you may remember that a while ago I bought some gorgeous fabrics with the intention of making a quilt for the baby. Not knowing whether we were having a girl or a boy, I wanted to go gender-neutral while still being fun, which is why I went for the brights.  I made a start on it pretty much immediately and here's what the first side looked like:


I have since finished it, but need to photograph it. Well, actually, I have sort of photographed it, but there's a baby on it in every picture. So I'll take one of quilt/playmat minus baby to share with you. I'm rather pleased with it.


Friday, 21 October 2011

rainbow fabric stack

Rainbow quilt, coming soon...


Sunday, 16 May 2010

easy peasy sewing tutorial {that stretchy band thing for your midriff}

If you're not sure what this thing is for, see my previous post (it's a good introduction, trust me).

So, as promised, here's the tutorial.

What you'll need:
  • a stretchy top in your size (I used a cheap fitted tee)
  • scissors, for cutting fabric
  • measuring tape
  • ruler (or just an object with a long straight edge - you could use a book)
  • chalk, for marking your fabric
  • a sewing machine (but you could easily do this by hand)


Now step into it and hide it under your top. Looks good, huh?


Now tell me, how did I do? Clear instructions? Was the text big enough? Have you made one following my instructions? How did it go?

Friday, 14 May 2010

easy peasy sewing tutorial {an intruduction}

Are you fed up with having to check that you're not showing your underwear (or worse!) every time you bend over?

Does it bother you that none of your tops are quite long enough?

Would you like a garment to stop your back getting cold when you're on your bike?

Do you feel self-conscious reaching up in case you show everyone your midriff?

Are you pregnant and needing something to cover your belly (or your undone trousers) because your top just doesn't want to stay down?

Then this tutorial is for you!

It is possible to buy bump bands for pregnant women, but they are ridiculously expensive for something so simple. So I was going to call this a bump band sewing tutorial or a maternity band sewing tutorial. But a friend reminded me that it's not just pregnant women who want a little something to cover up that exposed belly and/or hide those muffin tops. I'll let you into a little secret...

Come closer.

I have been wearing a belly band for the last year. Yup, I know, you didn't have a clue did you? You just thought I was wearing another top underneath. Nope, I get far too warm for that. No more tugging my trousers every time I sit down; no more checking my underwear status every time I bend over; and no more flashing my tummy every time I reach for something.

"So, what is this mysterious garment?",  I hear you ask. Well, it's a stretchy band of fabric which is worn under your top around your waist. To an outsider, it looks like you're doing a bit of layering. Pull it over your trousers a bit and it can hide those muffin tops brilliantly. Still confused? Please welcome our model for today who posed for these at the last minute (I'm hoping to update this post with a pregnant model, too)...

See that black band? That's it! 


It can even hide your behind when you're having a fat day ;)

No muffin tops here!

So, I'm still undecided as to what to call this thing. A modesty band? Sounds like some kind of hippy music group. A muffin belt? A hide-the-crack band? No? A belly band implies that it's not for small-waisted folk. I don't know. Any ideas? 

I'm still working on the actual tutorial, so you'll have to wait until Monday for that (I could have pushed myself, but my energy reserve is low. Sorry about that). But if you want to be really prepared for making your own, here's what you'll need:
  • a stretchy top in your size (I used a cheap fitted tee)
  • scissors, for cutting fabric
  • measuring tape
  • ruler (or just an object with a long straight edge - you could use a book)
  • chalk, for marking your fabric
  • a sewing machine (but you could easily do this by hand)
 Go and get your supplies and I'll see you on Monday. Have a good weekend!

Wednesday, 17 February 2010

the bunting is in the shop

Find it here.

Only two in the shop at the moment. I'll let you know when the others have been added. But, so as not to bore those of you who aren't interested, I'll let you know via my twitter feed. It certainly won't be in the next 12 hours though. I need sleep!


Tuesday, 2 February 2010

make it yourself {the bunting, that is}

By special request, I'll get these kits into the shop soon.


I only have 7 bunting kits so you'll have to move fast if you want one. I don't think I'll be making more. Certainly not in the next few months anyway.


Don't panic! They're not in the shop yet! I'll let you know when they're up so that you don't have to keep checking the shop every hour.


And if you want one of these before Valentine's Day, move fast.


I'm really unhappy with my blog design at the moment. I'm itching to change it. Ever since I started reading up on design, I'm able to pinpoint what's been bothering me about this layout. I may have to start teaching myself some very very basic html. Anyone know of a good place to start (and don't say college)? But that's not a job for today. No. Today I will be revising some BSL before my level 2 class tonight. Exciting!