Showing posts with label sewing. Show all posts

Friday, 31 May 2013

Making Dribble Bibs From Old Tees

In this post I will show you how to make your own dribble bibs.


[Warning: this post mentions dribble/drool and small children.]

Difficulty level: stupidly easy

So, why dribble bibs? Why not just bibs? Well, these bibs have a layer of micro fleece next to the skin, meaning the neck is kept completely dry while the bib is wet with drool. It's like some kind of magic! Yes, sliced bread was a pretty cool invention, but fleece was next in line.


So, here's what you'll need:
An old t-shirt, which is no good to anyone anymore (you know you're far too old to be wearing that Sesame Street top and it's way too bobbly to pass it on to someone else)
Some micro fleece (not microfibre - that stuff is very different and will make a huge mess the moment you cut into it. Micro fleece should just look like a really thin fleece blanket.)
Needle and thread
Velcro (or poppers, if you'd prefer)

1. How to get the right size/shape bib

To get the bib to the size/shape I wanted, I used a different bib as a template. Although this £8 Skibz bib looks cool, it's actually rubbish. Don't waste your money. I like the size and shape though, so I drew around that.


2. Cut your fabric

If you want to use the motif/image/logo on the tee, position your paper template accordingly and cut around it. You could either use your fancy rotary cutter, or you could pin the paper template to the fabric and cut around it with scissors, like the rest of us. Do the same with the fleece and pin it to the back of the bib.

The fleece definitely won't fray. The fabric of the top might, depending on what it is. But, because the look of these bibs is a repurposed 'hey-this-used-to-be-a-top' rough around the edges, I don't think it matters it it frays a bit.

3. Sewing the thing together

So, if you're following this, you should have your fabric and fleece pinned together (see above). Make sure the logo/pattern on your fabric is facing up, as you'd like it in the finished product. Either by hand or with a machine, stitch the bib, about 1cm in from the edge all around.


4. Adding the fastening

I chose Velcro because it's cheap and you don't need any fancy equipment to attach it. Cut the Velcro to size (I bought a roll of it from eBay) and pin in place - one bit on the fleece side of the bib and one bit on the fabric side (make sure you've got one fuzzy and one catchy, not two fuzzys or two catchys. Y'know - a positive and a negative. I'm sure I don't need to tell you how Velcro works but you never know these days). When you're happy with the placement of the Velcro, stitch it in place.


That's it! Bib done! Stick it to a baby Gently fasten it around your baby's neck and watch in amazement as that bad boy soaks up a gallon of drool!


Another handy thing about these bibs is that they're great for an extra bit of warmth around the neck for babies during the colder months. Which could mean any time of the year if you're in Britain.


So, not sure what to do with the extra fabric left from making this belly band? Make some bibs! This could be a cool baby shower gift.


Thursday, 10 January 2013

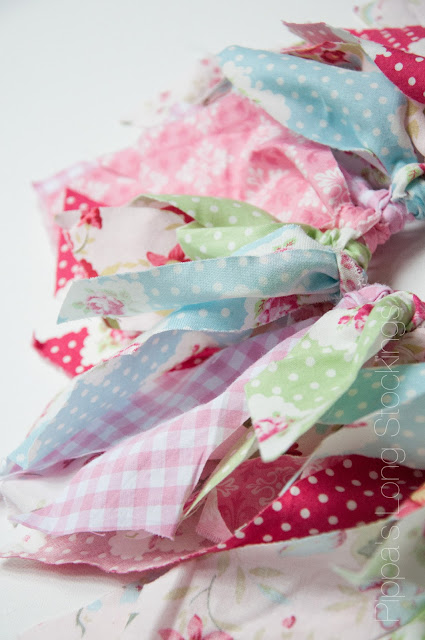
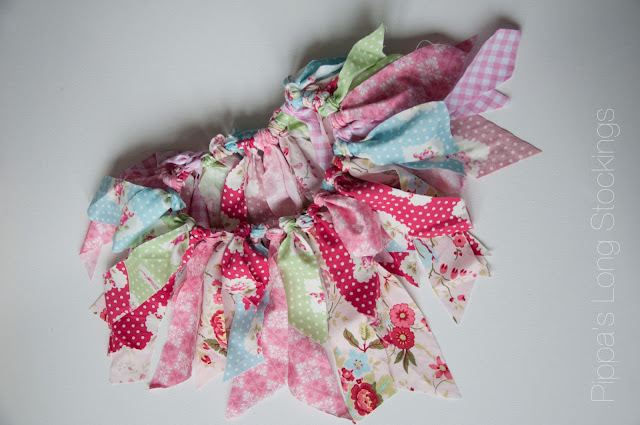
Scrappy fabric tutu {no sewing}

Hello you.

It's been a wee while. Turns out that life with a toddler is even more all-consuming than life with a baby. Who knew?! However, I did also have my BSL level 3 to complete, but that's done now, so I have time to blog.


So,  a little while ago (summer, perhaps. I'm not sure), I was commissioned to make something for a 3 year old girl. I excitedly suggested a tutu. I was told that the girl already loved tulle ballerina tutu. Ah, but did she have a scrappy fabric tutu?! This is a whole new world of tutu. This is a whole new tutu world. This is a new tutu for a new world. This is... different.
 

I used strips (varying lengths) of fabrics, with some Cath Kidston fabrics thrown in.


Using a 1" wide strip of elastic, I made a circle and tied it in a knot.


Taking the fabric strips, I tied/knotted them to the elastic.


It really was that easy. You could definitely make this.


And, because I didn't have a 3 year old girl to hand, I decided to model the tutu on my son's teddy so you could kind of see how it might look worn around the waist.


The teddy did not look happy about being used like this.


Wednesday, 16 May 2012

rainbow cloud

It began when I spotted this plushie on Pinterest.


I wanted one for my own baby. So I made one.


He really likes it.


Saturday, 17 March 2012

the finished rainbow playmat

My intention was that it could be used as a thin quilt and double up as a playmat. I now think it wouldn't make a particularly cozy quilt, so it's just a playmat. A super cool playmat.

So, these were the fabrics I chose back in September. They didn't come as part of a set. I just had a rummage in the 'fat quarter' bin for the brights and was most pleased with what I found.


And here's what I did with them next:


I had bought some cheap fleece a while back, so used that as the middle/inside of the playmat (you quilters are probably flinching at my having made it up as I went along). I kept the back plain, as it's only going to be on the floor anyway.


I ran it through the machine and stitched some wavy lines. But not too wavy.


I couldn't decide on which colour bias tape to use, so I went with four. Orange spotty:


Plain purple:


Blue spotty:


And plain green, which you can see the first picture of the finished playmat.

It was first used when O was a month old and I did a one month photo shoot with him lying on the mat (with plenty of cushions underneath to support him).


Now, it's used as an actual playmat. He has fun on there, which makes me happy.


Thursday, 12 January 2012

rainbow quilt/playmat

So, you may remember that a while ago I bought some gorgeous fabrics with the intention of making a quilt for the baby. Not knowing whether we were having a girl or a boy, I wanted to go gender-neutral while still being fun, which is why I went for the brights.  I made a start on it pretty much immediately and here's what the first side looked like:


I have since finished it, but need to photograph it. Well, actually, I have sort of photographed it, but there's a baby on it in every picture. So I'll take one of quilt/playmat minus baby to share with you. I'm rather pleased with it.


Monday, 21 November 2011

the obligatory bump picture

The last bump picture I posted on here was on this post, where I thought I had the biggest bump ever.

Ha. I now see how friends and strangers couldn't tell I was expecting back then.

Well, that marvellous maternity wrap top has grown as I have and I'm so glad I went for it and made one myself, even though I had the impression that my lack of a serger would put me at a disadvantage (I just used zig zag stitching instead).


These pics were taken a few weeks ago, before all of the leaves fell off that tree. And when I could still make myself look presentable. And when putting one foot in front of the other wasn't such a challenge.


If you're thinking of making one of these tops (you can make a non maternity version, y'know), I thoroughly recommend it. The most fiddly and time-consuming part of making it is cutting out the pattern. The sewing is a doddle. Doddle. I don't think I use that word enough.

The most fiddly and time-consuming part of actually owning/using this garment is finding a way to drape it on a hanger. Although, that's a doddle when you compare it with the time it takes to put on. Blimey. It reminds me a bit of that game you play with young people where each team is given a roll of toilet paper and they have to wrap one of their team mates up like a mummy. Worth it though (the top, not the toilet paper game. That's just a waste of toilet paper).

The next couple of weeks may feature loads of blog posts, as I pass the time until this little one arrives. Alternatively, it could go very very quiet, signifying the arrival of said little one. I'm hoping for the latter but preparing for the former.

I still haven't shown you my quilt! I'll get onto that next...


Friday, 21 October 2011

rainbow fabric stack

Rainbow quilt, coming soon...


Wednesday, 3 August 2011

Maternity Wrap Top

Recently, I've been rising to the challenge of finding things to wear with my growing bump.

[Please excuse the hair. It was day 5 of the 7 day hair washing cycle, so not at its best.]

Isabella Oliver has some stunning items, but she charges way too much. Sorry, Isabella. So, I found a free pattern online to make this maternity wrap top (I think it may have only been free for a limited period).

[Image from Megan Nielsen, found here.]

For someone who's never made an item of clothing out of stretch fabric, I found it all very straightforward and am even thinking about making another one in a different colour.

I would have found it incredibly helpful, when preparing to make my top, if I could have seen photos of each step, to confirm that I was doing it right. So, I might take some snaps when I make the next one for those of you who, like me, prefer photos to follow.

Sizing issues:
I broke the rules a bit with this top. And, not being an experienced seamstress, I wasn't sure how it would end up. The pattern came in three sizes: small, medium and larry. Ordinarily, I'd just go straight for the small as I have quite a petite frame. However, in my first trimester, I went up 5 cup sizes [TMI?], so that's thrown the sizing off somewhat. For something to fit me without straining at the seams in certain places (we all know what I'm talking about so I'm not going to spell it out), I have to go for the bigger sizes, which drown me everywhere else and make me look like I'm wearing someone else's clothes.

Here's the marvellous thing about making a top myself: I get to change the sizing! So, I went for the small size across the back and shoulders, but then cut along the lines for the medium size for the front and for the sleeves.

[Image from the Isabella Oliver website]

Changes I made to this pattern:
As I've explained above, I mixed up the sizing a bit so that some sections were small and others were medium.
I made the sleeves short. I had to experiment a bit, but it worked.
The pattern is for a top with unfinished seams, but I preferred seams, so added those (only around the neckline and on the sleeves.
I don't have a serger so I just used zigzag stitch and stretched the fabric as it went through the machine. 

Trickiest bits:
Putting the top on.
Putting the top on a hanger.
Seriously, the sewing of it was the easiest part. The trickiest bit about making it was cutting the fabric. Even then, it's not that it's difficult, it's just fiddly.

It's a lovely top to wear, but not one to attempt to put on in a hurry.

Picture taken at 20 weeks. I thought I was huge. Others didn't realise I was expecting.


*I, of course, meant small, medium and large. I just wanted to see if you were paying attention.

+Edit: That top lasted me well. There are another couple of pics of it in this post. The free pattern may not be available on that site now, but please do leave a comment with any alternative patterns you come across.

Sunday, 16 May 2010

easy peasy sewing tutorial {that stretchy band thing for your midriff}

If you're not sure what this thing is for, see my previous post (it's a good introduction, trust me).

So, as promised, here's the tutorial.

What you'll need:
  • a stretchy top in your size (I used a cheap fitted tee)
  • scissors, for cutting fabric
  • measuring tape
  • ruler (or just an object with a long straight edge - you could use a book)
  • chalk, for marking your fabric
  • a sewing machine (but you could easily do this by hand)


Now step into it and hide it under your top. Looks good, huh?


Now tell me, how did I do? Clear instructions? Was the text big enough? Have you made one following my instructions? How did it go?